This tutorial shows you how to Add An Event in your Joomla! Events Calendar as a Joomla! Administrator. Click on the thumbnail images to see an example of what you will be seeing as you go through the tutorial.
This tutorial assumes that your venues (locations) and categories are already set for you. If you would like help adding venues or categories please chedk out the Add An Event Venue or Add An Event Category tutorials or give us a call.
First, log into your Joomla! administration area.
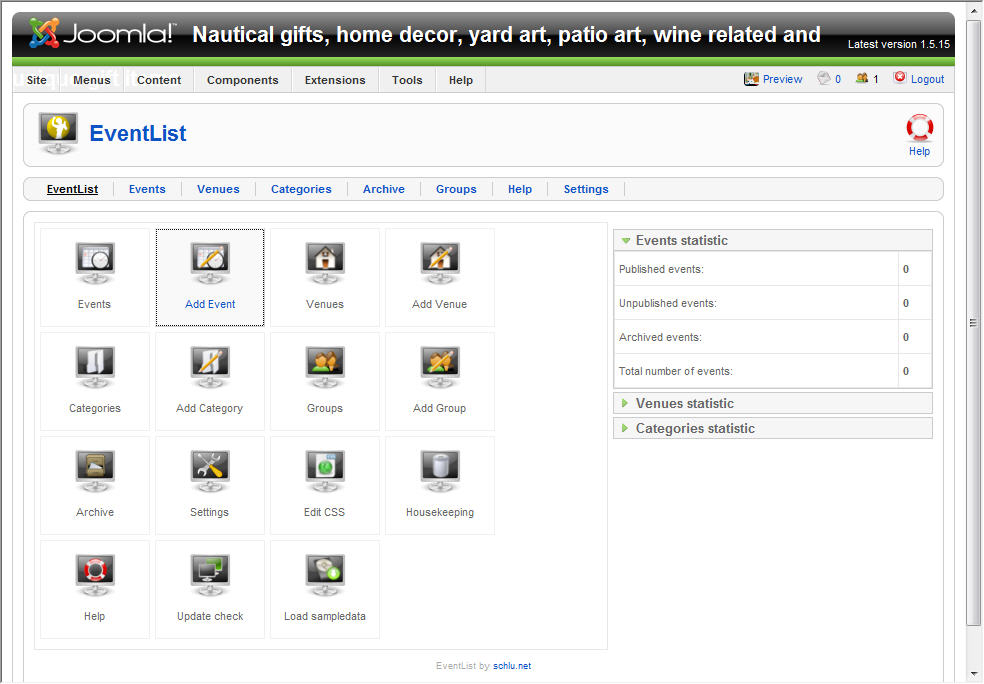
On the administration navigation bar, mouse over Components, in the drop down menu choose Event List.

Click on Add Event
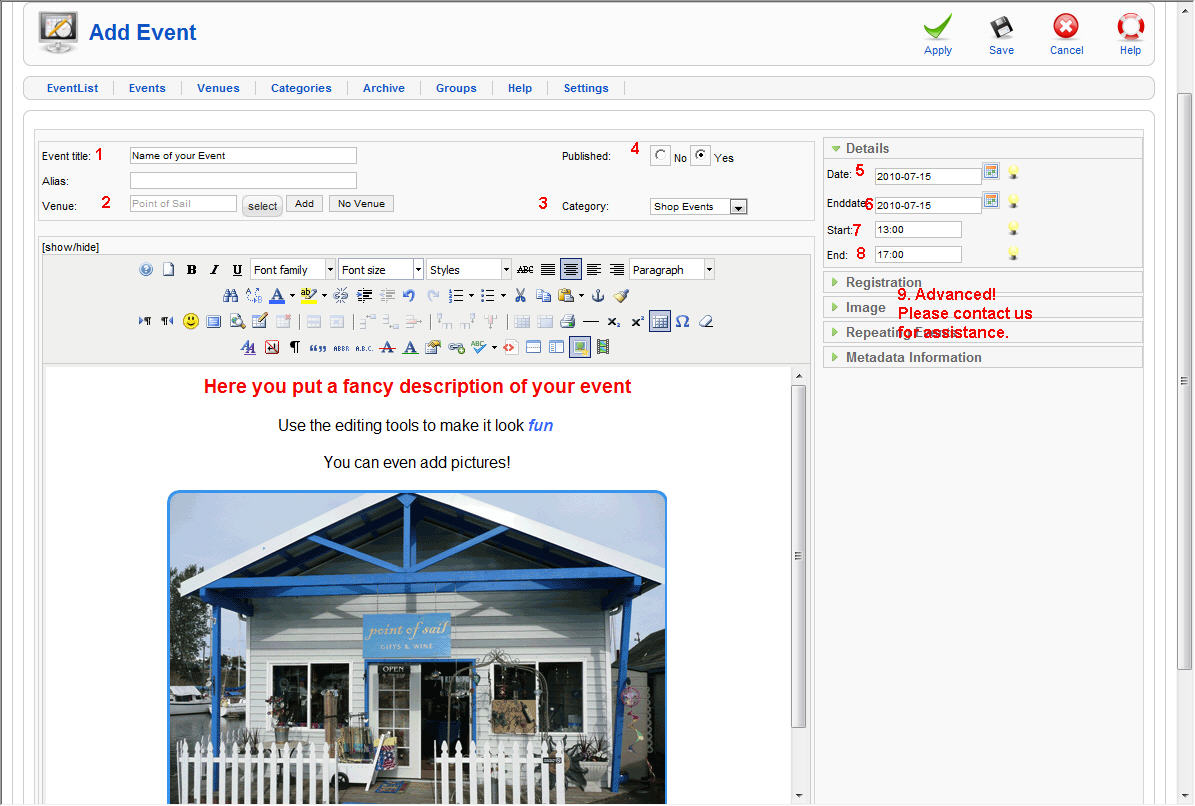
Complete the fields we have shown in the example below (click thumbnail for larger view). (You may find it helpful to click the larger view of the image to use with this tutorial). Below is a map to the fields with some additional explanation. Please note that this tutorial is for just adding a simple event. If you have more advanced needs please contact us or look through the other tutorials to see if you find the help you need.
1. Event Title – this is like the Headline of your event.
2. Venue (required) – click the select button to find a venue that has already been added for you. If you wish to add a new venue click the “add” button. If this is a website only event we recommend that you select the “no venue” option.
3. Choose a category for this event (required)
4. When you are ready for the world to see this event on your website you will want to make sure you have chosen the “published yes” option.
5. This is the START date of your event (required). Please note that you MUST use the correct date format. For example July 1, 2010 would be entered here as 2010-07-01. (It’s easiest to use the pop up calendar to select your date)
6. This is the END date of your event (required). Please note that you can have the end date the same date as your start date.
7. Start time (required). This is the time of day your event begins. Please note that you MUST format your time using “military” (24 hour) time. For example, 1PM in the afternoon would be 13:00.
8. End time (optional). If your event will only be for a set time (say 4 hours) you will want to include an end time. This MUST be in military time also. For example 5PM would be 17:00.
9. This tutorial assumes that the Registration, image, repeating and meta information fields are to be left as is without editing. If you have other needs please contact us.
Once you fill out all of the fields above have some fun creating a more detailed description of your event!
Once you have completed the form and the descripton be sure to hit “save”. If you have selected “Published Yes” your event will now show up on your events list. If you have not chosen to publish yet it will not be visible to the public.